This post may contain affiliate links. We earn a small commission if you make a purchase, at no extra cost to you. See our full disclosure.
Here’s a truth that hits different when the grocery store shelves go empty: a survival garden isn’t just a hobby. It’s insurance. The kind of insurance that actually feeds your family when supply chains break, prices spike, or — let’s be honest — when you simply decide you’re done depending on a system that wasn’t designed with your wellbeing in mind.
I’ve been growing food for over a decade now. And the single biggest shift in my thinking came when I stopped gardening for fun and started gardening for survival. Not doom-and-gloom survival. Practical, everyday, “I know exactly where my next meal is coming from” survival.
That’s what this guide is about.
Whether you’re deep into emergency food preparedness or just starting to explore homesteading skills, planting a survival garden is one of the most impactful things you’ll ever do. So let’s dig in — literally.
What Makes a Survival Garden Different From a Regular Garden?
Your neighbor’s tomato patch is lovely. Beautiful heirlooms, maybe some basil tucked in between. But could it sustain a family through a real crisis? Probably not.
A survival garden is built around three principles that most backyard gardens completely ignore:
Calorie density. Pretty lettuce salads don’t keep you alive. Potatoes, dried beans, winter squash — these are the crops that actually deliver enough calories to survive on. A single acre of potatoes can produce 40,000+ pounds of food. Try that with kale.
Storage crops. If you can’t preserve it or store it, you’ll feast for three months and starve for nine. The backbone of any survival garden is food that stores naturally — root vegetables in a root cellar, dried beans in mason jars, winter squash on a pantry shelf. No electricity required.
Seed saving. This one’s huge. A garden that depends on buying new seeds every spring isn’t really self-sufficient, is it? Real survival gardening means growing open-pollinated varieties you can save seed from, year after year, indefinitely. One bad year at the seed company, one shipping disruption — and you’re still growing. That’s independence.
Think of it this way: a regular garden supplements your meals. A survival garden replaces them.
Best Crops for a Self-Sufficient Survival Garden
Not all vegetables are created equal when you’re growing for survival. You need a mix of calorie-dense staples, nutrient-packed greens, and storage champions. Here’s what belongs in your garden — and why.
Potatoes — The Undisputed Calorie King
If I could only grow one crop, this is it. Potatoes produce more calories per square foot than almost anything else you can plant. They store for months in a cool, dark space. They’re versatile in the kitchen. And they’re surprisingly easy to grow — even in containers or straw bales if space is tight.
Plant early, mid, and late varieties for a staggered harvest that stretches from June through October. Yukon Gold for eating fresh, Kennebec for storage, fingerlings for something special. A family of four? Plan for at least 100 row feet.
Dry Beans — Your Protein Powerhouse
Beans and rice. There’s a reason this combination has fed civilizations for thousands of years. Dry beans — black beans, kidney beans, pinto, navy — pack serious protein and store almost indefinitely when properly dried.
Most gardeners only grow green beans. That’s a mistake. Let those pods mature on the vine, dry completely, then shell and store them. A 50-foot row can easily yield 10–15 pounds of dried beans. That’s real food.
Winter Squash — Nature’s Canned Goods
Butternut. Hubbard. Acorn. Spaghetti squash. These aren’t just fall decorations — they’re calorie-rich, vitamin-dense, and store for 3–6 months without any processing at all. Just set them on a shelf.
The Waltham Butternut is practically indestructible in storage. I’ve had them last seven months in my basement. Seven. No canning, no freezing, no dehydrating. Just sitting there, perfectly edible.
Corn — The Three Sisters Staple
Grow dent corn or flint corn — not sweet corn (though sweet corn is great for fresh eating). Dent and flint varieties dry on the stalk, store for years, and can be ground into cornmeal, grits, or masa for tortillas. Native Americans knew what they were doing with the Three Sisters planting method (corn, beans, squash together), and it still works beautifully.
Tomatoes — Nutrition and Morale
Technically not a calorie crop, but tomatoes are packed with vitamins — and they’re essential for morale. In a survival situation, flavor matters more than you think. Paste tomatoes like San Marzano or Roma can tomato sauce by the quart. And if you’ve got a way to can them (more on that in a second), you’ve got vitamin C and lycopene all winter long.
Leafy Greens — Fast and Nutrient-Dense
Kale, Swiss chard, collards, spinach. They grow fast, tolerate cool weather, and deliver vitamins and minerals that starchy staples lack. Kale in particular is almost ridiculously cold-hardy — I’ve harvested it in December with snow on the ground.
Succession plant every 2–3 weeks for a continuous harvest rather than one overwhelming glut.
Root Vegetables — The Underground Pantry
Carrots, beets, turnips, parsnips, rutabagas. Leave them in the ground under a thick layer of mulch and they’ll store themselves right through winter in many climates. Parsnips actually get sweeter after a frost. Nature’s candy, buried in your backyard.
Don’t overlook sweet potatoes if you’re in zones 5 and above. Incredible calorie density, excellent storage life, and the slips are easy to propagate yourself.
📚 Want to Master Self-Sufficient Food Production?
Joel Salatin — America’s most famous farmer — offers his Farm Like a Lunatic course that covers everything from garden planning to building a fully self-sufficient homestead. His Foundations module is especially relevant for survival gardeners looking to scale up. If you’re serious about food independence, this is the real deal.
Survival Garden Seeds: Heirloom vs. Hybrid and Where to Buy
Let’s settle this debate once and for all.
Heirloom seeds are open-pollinated varieties that have been passed down through generations. They breed true — meaning the seeds you save will produce plants identical (or very similar) to the parents. For a survival garden, this is non-negotiable. Your seed supply becomes self-renewing.
Hybrid seeds (F1 hybrids) are crosses between two different varieties. They often produce higher yields or better disease resistance in year one. But save those seeds? The next generation will be unpredictable — and usually inferior. For a survival garden, hybrids are a dead end.
That said, I’m not a purist. If a hybrid tomato resists late blight in your area and keeps your plants alive when heirlooms fail — grow it alongside your heirlooms. Just make sure your core survival crops are open-pollinated varieties you can save seed from.
Where to Buy Survival Garden Seeds
Skip the big box stores. Their seed racks are mostly hybrids, often from questionable sources. Instead, look for these reputable suppliers:
- Baker Creek Heirloom Seeds — Massive selection, all non-GMO, all open-pollinated
- Seed Savers Exchange — A nonprofit dedicated to preserving heirloom varieties
- Johnny’s Selected Seeds — Professional-quality seeds with excellent germination rates
- Territorial Seed Company — Great for Pacific Northwest growers
- Southern Exposure Seed Exchange — Specializing in heat-tolerant varieties for southern climates
Build a Seed Vault
Buying seeds once is smart. Building a seed vault is smarter.
Store extra seeds in airtight containers (mason jars work perfectly) with a silica gel packet to absorb moisture. Keep them in a cool, dark, dry location — a basement shelf or even a dedicated mini-fridge set to around 40°F. Most vegetable seeds remain viable for 3–5 years stored this way. Some (like tomatoes and peppers) can last a decade.
Rotate your stock. Plant from your vault, then replenish it with freshly saved seeds each season. This isn’t hoarding — it’s the same principle behind any well-managed pantry.
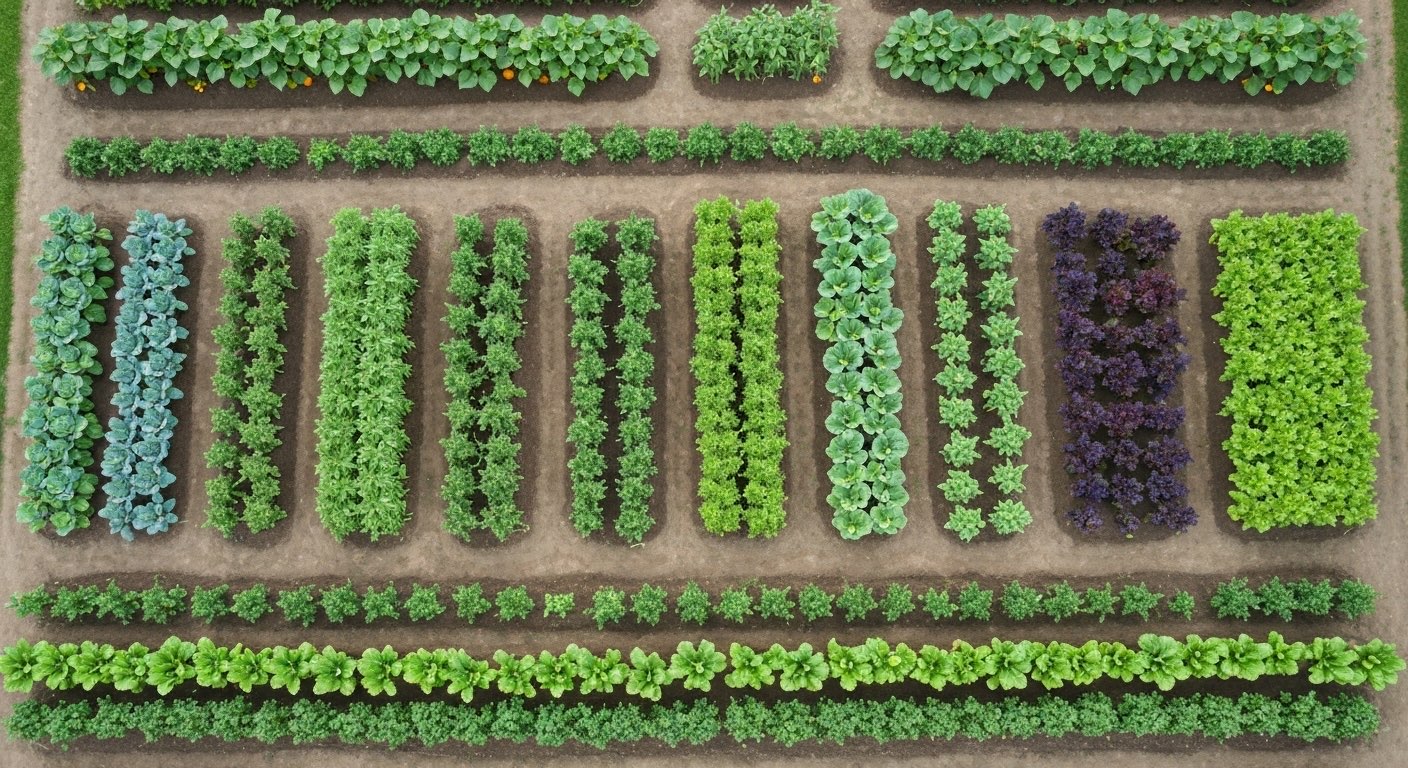
Planning Your Survival Garden Layout
Here’s where beginners overcomplicate things. You don’t need a perfect plan. You need a plan — and the willingness to adjust as you learn.
Raised Beds vs. In-Ground
Raised beds look great on Instagram. They’re excellent for bad soil, poor drainage, or physical accessibility. But for a survival garden? In-ground planting is often better. Why? Scale. You can plant a lot more food in 2,000 square feet of tilled ground than you can in a dozen 4×8 raised beds. And you won’t spend hundreds on lumber and fill soil.
My recommendation: use raised beds for your high-value, intensively managed crops (salad greens, herbs, tomatoes). Plant your calorie crops — potatoes, corn, beans, squash — directly in-ground. Best of both worlds.
Companion Planting That Actually Works
A lot of companion planting advice is folklore. But some combinations genuinely perform:
- Three Sisters (corn + pole beans + squash) — The corn gives beans something to climb. Beans fix nitrogen in the soil. Squash leaves shade the ground, suppressing weeds and retaining moisture. Centuries of proof.
- Tomatoes + basil — Basil repels certain pests and some gardeners swear it improves tomato flavor (jury’s still out on that, but it can’t hurt)
- Carrots + onions — The onion scent helps confuse carrot fly, and they don’t compete for root space
Don’t overthink this. The most important “companion planting” is just making sure tall crops don’t shade out short ones and heavy feeders aren’t competing with each other.
How Much Space Do You Actually Need?
For a family of four aiming toward true self-sufficiency, plan on at least 4,000 square feet (about 1/10th of an acre) for vegetables alone. Want to include grain corn and dry beans at scale? Double it.
Don’t have that much space? Start with what you have. Even 200 square feet can produce a meaningful amount of food. Scale up as you’re able — but start now.
Soil Preparation: The Foundation of Everything
You can have the best survival garden seeds on the planet. Won’t matter if your soil is dead.
Good soil grows good food. It really is that simple — and that complicated. Here’s the short version:
Get a soil test. Your county extension office will do this for $15–30. It tells you your pH, nutrient levels, and organic matter content. Don’t guess. Test.
Add compost. Then add more compost. Compost is the single greatest thing you can do for any garden. It improves drainage in clay soils, improves water retention in sandy soils, feeds the microbiology that makes nutrients available to plants, and slowly releases nitrogen, phosphorus, and potassium. Start a compost pile today — a tumbling composter makes it easy with kitchen scraps, leaves, grass clippings, coffee grounds, and cardboard. In 6–12 months, you’ll have black gold.
Mulch everything. Wood chips, straw, shredded leaves — 3-4 inches of organic mulch suppresses weeds, conserves moisture, moderates soil temperature, and breaks down into more organic matter over time. Joel Salatin talks about this in his Farm Like a Lunatic course — building soil biology is the foundation of productive growing, whether it’s a garden or a 500-acre farm.
If you’re gardening in truly awful soil (pure clay, compacted fill dirt, rocky ground), consider a no-dig approach: lay cardboard over the existing ground, pile 6–8 inches of compost on top, and plant directly into it. The cardboard smothers weeds while the compost creates an instant growing medium. By next year, the worms will have done the rest.
Extending Your Growing Season
A survival garden that only produces for four months out of the year isn’t enough. You need strategies to push that window earlier in spring and later into fall — maybe even through winter, depending on your climate.
Cold Frames
Basically a bottomless box with a clear lid. Old windows work perfectly. Set one over a raised bed in March and you can start lettuce, spinach, and radishes weeks before your last frost date. In fall, they’ll keep greens alive well into December. Cheap, effective, no moving parts.
Hoop Houses and Row Covers
Bend some PVC or electrical conduit into hoops, drape them with greenhouse plastic or floating row cover, and you’ve got a mini greenhouse. Even a single layer of row cover can buy you 4–8°F of frost protection. That translates to weeks — sometimes a full month — of extra growing time on each end of the season.
Succession Planting
This isn’t about extending the season per se — it’s about maximizing what the season gives you. Instead of planting all your lettuce at once (and watching half of it bolt before you can eat it), plant a new batch every 2–3 weeks. Same with beans, radishes, beets, and carrots.
Think of it as a rolling harvest rather than one big event. Steadier food supply, less waste, less overwhelm.
🏺 Forgotten Preservation Techniques That Still Work
Our grandparents (and their grandparents) preserved food without electricity, refrigeration, or fancy equipment. The Lost Superfoods is a fascinating guide to these old-world preservation methods — from long-lasting hardtack and pemmican to root-cellaring techniques that keep produce fresh for months. If you’re building a survival garden, knowing how to preserve the harvest is just as important as growing it.
Preserving Your Harvest
Growing the food is half the battle. Maybe less than half. Because if you can’t preserve what you’ve grown, a bumper harvest in August doesn’t help you in February.
Your main preservation methods:
Canning (water bath and pressure canning) — Tomato sauce, salsa, pickles, jams, green beans, soups, stews, bone broth. A good pressure canner lets you safely preserve low-acid foods that water bath canning can’t handle. This is a cornerstone skill for any serious homesteader.
Dehydrating — Jerky, dried herbs, fruit leather, dried beans and peppers. Dehydrated food is lightweight, shelf-stable, and takes up very little space. A basic electric dehydrator runs about $50. Or build a solar dehydrator for almost nothing.
Root cellaring — Potatoes, carrots, beets, turnips, parsnips, winter squash, apples, cabbage. Any cool (32–50°F), humid, dark space works — a basement corner, a buried trash can, even a hole in the ground lined with straw. No energy inputs, no equipment, minimal effort.
Fermentation — Sauerkraut, kimchi, fermented hot sauce, pickles. Lacto-fermentation doesn’t just preserve food — it creates beneficial probiotics and increases nutrient availability. A head of cabbage, some salt, and a mason jar. That’s it.
Freezing — Effective, but requires electricity. In a true grid-down scenario, your freezer is a ticking clock. Use it as a supplement, not your primary method. Pair your freezer stores with a solar power setup for redundancy.
Common Mistakes New Survival Gardeners Make
I’ve made most of these. Learn from my failures.
Planting too much at once. Enthusiasm is great. Burnout is real. Start with a manageable plot — maybe 500 square feet — and expand each season as your skills grow. A well-managed small garden outproduces a neglected large one every single time.
Ignoring soil health. Seeds don’t care how expensive they were. Plant them in dead, compacted, nutrient-poor soil and they’ll give you dead, stunted, nutrient-poor plants. Invest in your soil first. Everything else follows.
Growing only what you like to eat. Love tomatoes? Great. But tomatoes alone won’t sustain a family. Force yourself to grow calorie crops — potatoes, beans, squash, corn — even if they’re not as “exciting” as heirloom cherry tomatoes. Survival first, Instagram later.
Not saving seeds. Year one, buy your seeds. Year two, start saving. By year three, you should be producing most of your own seed stock. This is the entire point of growing open-pollinated varieties. Use it.
Forgetting about water. A garden needs consistent moisture. If you’re on a well — great. If you’re on municipal water that could be disrupted — you need a backup. Rain barrels, a pond, a spring, even a hand-dug well. Water is non-negotiable.
No preservation plan. Growing 200 pounds of tomatoes doesn’t help if they all ripen the same week and you haven’t set up for canning. Plan your preservation strategy before the harvest hits.
Here’s one more that people rarely talk about: not integrating livestock. Even a small flock of chickens transforms a survival garden. They eat pests, produce manure for compost, and give you eggs — arguably the most efficient protein source you can raise at home. We’ve got a whole guide on raising chickens for beginners if you’re ready to take that step.
🔧 Traditional Skills for Modern Homesteaders
There was a time when every family knew how to build a root cellar, smoke meat, make soap, and preserve food without electricity. Most of that knowledge has been lost — but it doesn’t have to stay that way. The Lost Ways is packed with traditional pioneer techniques for self-sufficient living, from building water filtration systems to long-term food storage methods. It pairs perfectly with a survival garden — because growing the food is only step one.
These are the tools and supplies that make starting (and maintaining) a survival garden much easier:
• 55-Variety Heirloom Vegetable Seed Vault — Over 35,000 non-GMO seeds, all open-pollinated and ready for seed saving.
• Vego Metal Raised Garden Bed Kit — Durable, deep beds perfect for intensive vegetable growing.
• VIVOSUN Tumbling Composter — Dual-chamber design lets you compost continuously without the mess.
Your Survival Garden Action Plan
All of this is useless if you don’t actually start. So here’s your action plan — no excuses:
- Get a soil test this week. Call your county extension or order a kit online. $20 and 15 minutes of your time.
- Order heirloom seeds. Focus on the Big Five: potatoes, dry beans, winter squash, corn, and tomatoes. Add greens and root vegetables as space allows.
- Start composting today. Literally today. A pile of leaves and kitchen scraps in a corner of your yard. It doesn’t need to be fancy.
- Plan your plot. Sketch it on a napkin if you have to. Decide what goes where based on sun exposure, water access, and the calorie-density priorities we talked about.
- Plant when the time is right for your zone. Not before — you’ll lose plants to frost. Not later — you’ll lose growing days you can’t get back.
- Learn to preserve. Pick one method this season — canning, dehydrating, or fermenting — and get good at it. Add another method next year.
- Save seeds. Even if it’s just from one crop your first year. Tomatoes are easiest — let a few fruits over-ripen, scoop out the seeds, ferment them for a few days, dry them on a paper plate. Done.
The best survival garden is the one you start. Not the one you plan perfectly for three years and never plant.
Pair your garden with a solid emergency food preparedness strategy, and you’ll have the kind of food security that no supply chain disruption, inflation spike, or crisis can touch. That’s not paranoia — that’s just good sense.
And if you’re ready to go beyond the garden and build a fully self-sufficient homestead, Joel Salatin’s Farm Like a Lunatic course will show you how to integrate animals, gardens, orchting, and soil-building into a system that feeds your family and regenerates your land at the same time. It’s the blueprint I wish I’d had when I started.
Now go get your hands dirty. 🌱